

IC hooks grab onto wires, leads, and pins of electronic parts. Usually, the hook electrically connects a component to a measurement device, such as a multimeter, oscilloscope, or logic analyzer. Alternatively, the hooks can connect together a temporary or impromptu circuit, or simply attach the electronics to a battery or bench power supply.
Unlike a pointy multimeter probe, the purpose of the hook is to stay attached for hands-free operation. The most common failure of an IC hook is when it pops off the component, either because the hook was not properly secured, the wire/lead is too large, or because the hook itself is worn or damaged.
Most hooks feature a little plastic lip on the tip of their plastic shell to prevent the component wire/lead from sliding free. The J-shaped hook retracts into the lip to grip the wire. Unfortunately, because the lip is a tiny bit of plastic, it has the tendency to snap off.

Intact and broken IC hook tip
Although the broken IC hook still works in a pinch, it is unreliable and needs to be replaced.

Intact and broken hook tip holding wire
Robust IC hooks tend to have longer support at the tip. This makes it unlikely that the lip will break off, but it may prevent the tip from fitting into some circuits.

Less brittle IC hook design and material
To take apart the IC hook probe, extend the hook and then bend it straight with needle-nose pliers. To avoid damaging the metal, use smooth (flat) jaw pliers instead of serrated pliers, and bend the hook slowly and gently.

Straightening IC hook with smooth jaw needle nose pliers
The copper hook is then free to slide through the plastic top. The remainder consists of a plastic base, a copper strip, and a spring.

Copper strip and spring inside of an IC hook probe
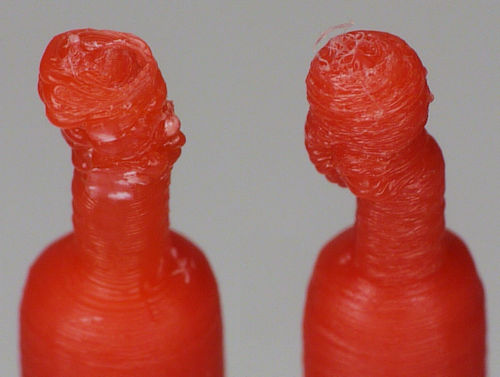
I decided to print a replacement for the top half of the IC hook probe. This is a difficult piece to make using a standard fuse-deposition hobbyist 3D printer, because the replacement part:
Despite the challenges, I break enough IC hook probes to at least warrant the attempt. Needless to say, it took multiple revisions:

Evolution of replacement IC hook sheath
The first problem was trying to print a pair 1.27 mm holes in a 3.5 mm tip atop a 50 mm tall narrow tube. The printer lacks the stability and resolution to reproduce such details.
Failure of small details in 3D print
So, I extended the tip down to the main tube and printed it solid. The tiny holes were then drilled out on a drill press -- which unfortunately makes it less reproducible by others.

Drilling holes in probe tip
Some of the support beneath the lip could be cut out with a razor blade or hobby knife, if it gets in the way of circuitry. Regardless, the new tip is functional.

Replacement IC hook top
The second problem was warpage of the initial layers of the 3D print.

Warped bottom layers
Not only did the warping make the opening too narrow to fit on the remainder of the IC hook body, but the shape wasn’t even symmetrical.

Warped bottom layers bottom view
The solution was to print the part on a raft. Not only does this raise up the first layers, but also provides a wider cross-hatched platform to more evenly resist stresses.

Skirt and raft to increase reproductive accuracy
The final problem was shrinkage in the ABS plastic after cooling. Basically, I needed to resize the print, measure the result, adjust the model size, and print again. If I want to use a different material, such as PLA, I’ll need to adjust the model dimensions again to compensate differently.
The model is available on Tinkercad.

Model parts to make plastic IC hook case
The model was fairly simple to make. Primarily, it consists of cylinders that are measured from the original IC hook casing using a digial caliper. The holes were measured using a pin gage set, however a nice set of drills would have worked equally well.
The successful part was printed on a glass bed with hairspray at 120° C, with a skirt and raft, using ABS heated to 220° C.

Repaired IC hook probe adapter holding resistor
Instead of printing a part, why not simply discard it and buy a replacement? Well, the adapters I like so much were only sold by RadioShack (part #270-334). We know how that's turned out.
A while back, I bought 25 IC hook adapters in red and in black so that I'd always have a supply. I got these from MPJA (#27161 MI and #27163 MI), but they are ubiquitous on auction sites.
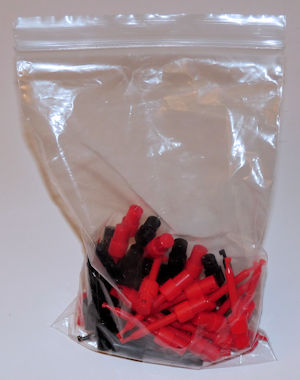
Bag of IC hooks
Unfortunately, it turns out the bases of these are intended to be wired to cables. I wanted bases that adapt pointy multimeter probes.

IC hook with wire end vs probe adapter end
Just as I was about to add them to a junk box, I realized the molded top portion matches the adapters. Simply bend the tip, remove the top portion, and replace the broken top portion on the adapter. No 3D printer needed!

Disassemble to get replacement tip