We’re building a playing field for a robotic egg hunt contest. At this point, the scoring area has been completed by attaching the flooring. All that remains are the walls.
The walls of the playing field are various lengths of board painted black.
Due to board-length availability, and convenience of storage and transportation, keep all board lengths equal to or less than 6 feet (72 inches). The longest span (14 feet) can be made up of two 6 foot boards and a 2 foot board, since you’ll have leftover 2 foot boards from the 4 foot sections.
Each wall segments can be attached to the next with lift-off pin hinges. McMaster-Carr #1151A81 (left hand) and # 1151A82 (right-hand).
Hinges prevent the boards from falling over, but also the hinges allow some adjustment to the angles caused by woodworking errors or changes in dimension due to humidity or age.

Numbered brackets make assembly fast and consistent.
Number the hinges to make it foolproof to assemble by volunteers or borrowers that may not have put the arena together previously. In the above photograph, I’m not sure why I decided to number each hinge half sequentially (23, 24). Instead, use the same number for both halves of the hinges that go together.
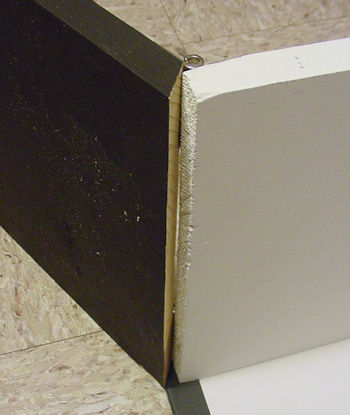
Most table saws have blades that can be tilted to cut the edge of the board at an angle. Unfortunately, they usually can’t tilt enough to match some of the sharp angles needed by the arena. This results in small spaces or gaps between boards.

Gap due to obtuse angle exceeding table saw tilt.
Gaps can also occur if you fail to cut angles on some of the boards or if a board is accidentally cut at the wrong angle.
Other than for esthetic reasons, minor exterior gaps aren’t a problem. But larger gaps can lead to light seepage and robots can become stuck on interior gaps.
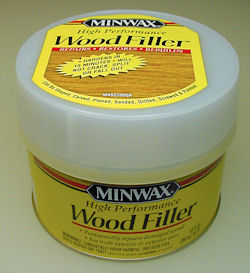
Wood filler is available at almost all hardware stores. You’ll probably want a large container as opposed to a small tube.

Minwax wood filler.
Since the arena is going to be disassembled, you want the wood filler to adhere to only one end of the board.
Tape up all but one side of the adjoining wood. Apply light oil to the surface of the tape and the hinges. If you don’t apply oil, the wood filler will bond with the tape. (Guess how I know that.)

Taping and oiling all but one side to prevent sticking.
Set up the entire arena to be sure the angles are exactly how you want them. Then fill in the gaps between boards with the wood filler. It may take several coats to build up the surface (follow the manufacturer’s directions).

Wood filler in place with clean separation.
Allow the wood filler to dry. Unhinge the boards, remove the tape, lightly sand the wood filler, wash it with a damp sponge, and paint it to match the board.
The gaps don’t need to be perfectly filled.
Ta da! Other than some gray carpeting, the arena is complete and ready for competition.

Robotic egg hunt contest arena.
Working with large wood boards is very different than small precision metal machining to which I’m accustomed. It’s hard work that requires muscle power and a different set of tools.
The lip was the most complicated part. It might be easier to use a simple flat piece and duct tape it in place for each competition. My rounded PVC lip makes life easier for the robots, but perhaps it is equally appropriate to require competitors to overcome a bit of a barrier in order to score. That’s perfectly fair as long as they have a chance to design and test against whatever lip will be used.
I’m disappointed in the quality of the boards I selected. Warping was enough of a problem that the hinges needed washers or spacers in a couple of places to have them connect properly. Some issues were taken care of by the wood filler.
All in all, I am my own harshest critic. Although I’ll constantly notice every little flaw, the area turned out very well and can be fully enjoyed by both human competitors and robots alike.