

Unlike most of my newer robots, this forward-reverse bumper robot doesn’t use a microcontroller nor does it require fancy machining. In fact, if you can build Sandwich from Robot Building for Beginners, then you have all the tools and skills needed to build the Flip-Flop Robot.

Flip-Flop Robot inside of a candy-container toy car. (Palmer Double-Crisp Ricky Rudd #28 formerly-collectible tin)
On the outside, the robot looks like a humble automobile candy container, similar to Sweet, but with wooden bumpers. When the robot is turned on, it drives forward until the front bumper makes contact with an obstacle. Then, the robot drives backward until the rear bumper makes contact with an obstacle. It repeats this over and over again.
Here is a movie of the robot in action:
This would be a good robot for the Dallas Personal Robotics Group (DRPG) Quick-Trip contest. In that contest, a robot is timed on how quickly it can drive forward to a wall and then return.
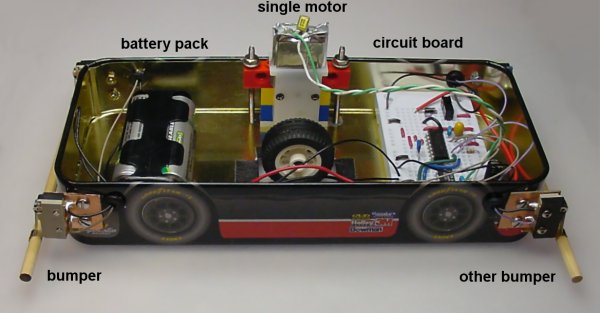
Side view of the Flip-Flop Robot showing bumpers, battery pack, motor, and circuitry.
Besides the candy container body, the robot consists of:
The motor and motor mount in this robot are similar to the Atari Joystick robot. If you choose to use the Solarbotics GM7 motor, see the joystick page for instructions on drilling holes and securing that specific motor to a Lego Technic beam.
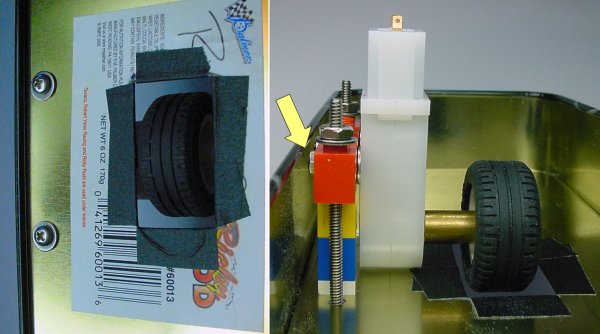
Single GM7 gearmotor mounted in the center using Legos and screws.
The motor mount is made of Legos. It is installed vertically and is held onto the bottom of the tin body by two 1 3/4 inch long #4-40 screws (available at local hardware stores or online at McMaster-Carr or MSC Direct).
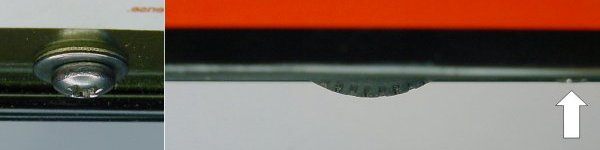
For smoothest movement, the bottom screw heads should be flush, whereas the wheel should stick out a little.
The wheel is positioned such that it barely sticks out beneath the center of the floorboard. If the wheel stuck out too far, then the robot would tip to and fro as it changed directions. If the wheel didn’t stick out enough, it wouldn’t make contact with the ground and would simply spin in place.
Fortunately, the wheel position adjusts easily with different heights of Lego bricks. If you need an even finer amount of adjustment, simply insert cardboard, layers of tape, or washers between the lowest Lego and the bottom of the candy tin.
As with all homemade robots, one of the more difficult problems is attaching a wheel to the motor. My “Lego motor coupler” is an old faithful technique of connecting a Lego wheel to a non-Lego motor using a Lego cross axle epoxied inside a metal rod or tube. There are at least three different methods for creating the coupler:
Alternatively, you can avoid making a coupler altogether by using a standard Lego motor or a non-Lego motor that already includes a wheel.
This robot is unusual in that it only has one motor. Most robots have at least two motors so that they can steer. However, because this robot just goes forward or reverse, it only needs a single motor.
Using only one motor makes the robot lighter, less expensive, and less complex. But, it means the motor needs to be installed straight or else the robot will drive at an angle.
Next, we'll see how the motor is mounted and the wheel opening is cut.